Proxmox cheatsheet: expanding storage
$ cat TOC
Almost my entire homelab being ran on Proxmox VE, I often run into VMs either requiring persistent storage or, worse, more disk space. Therefore, in this article we’ll explore the process of adding a new disk to a Proxmox virtual machine and making it accessible within the VM.
The following steps assume that you
- have a working installation of Proxmox
- have both a virtual machine and a Thinpool LVM on the same node
- you are able to access the virtual machine using SSH and have administrative permissions
Adding storage in Proxmox
In the Hardware settings of your VM, add a new Hard Disk from the existing LVM storage.
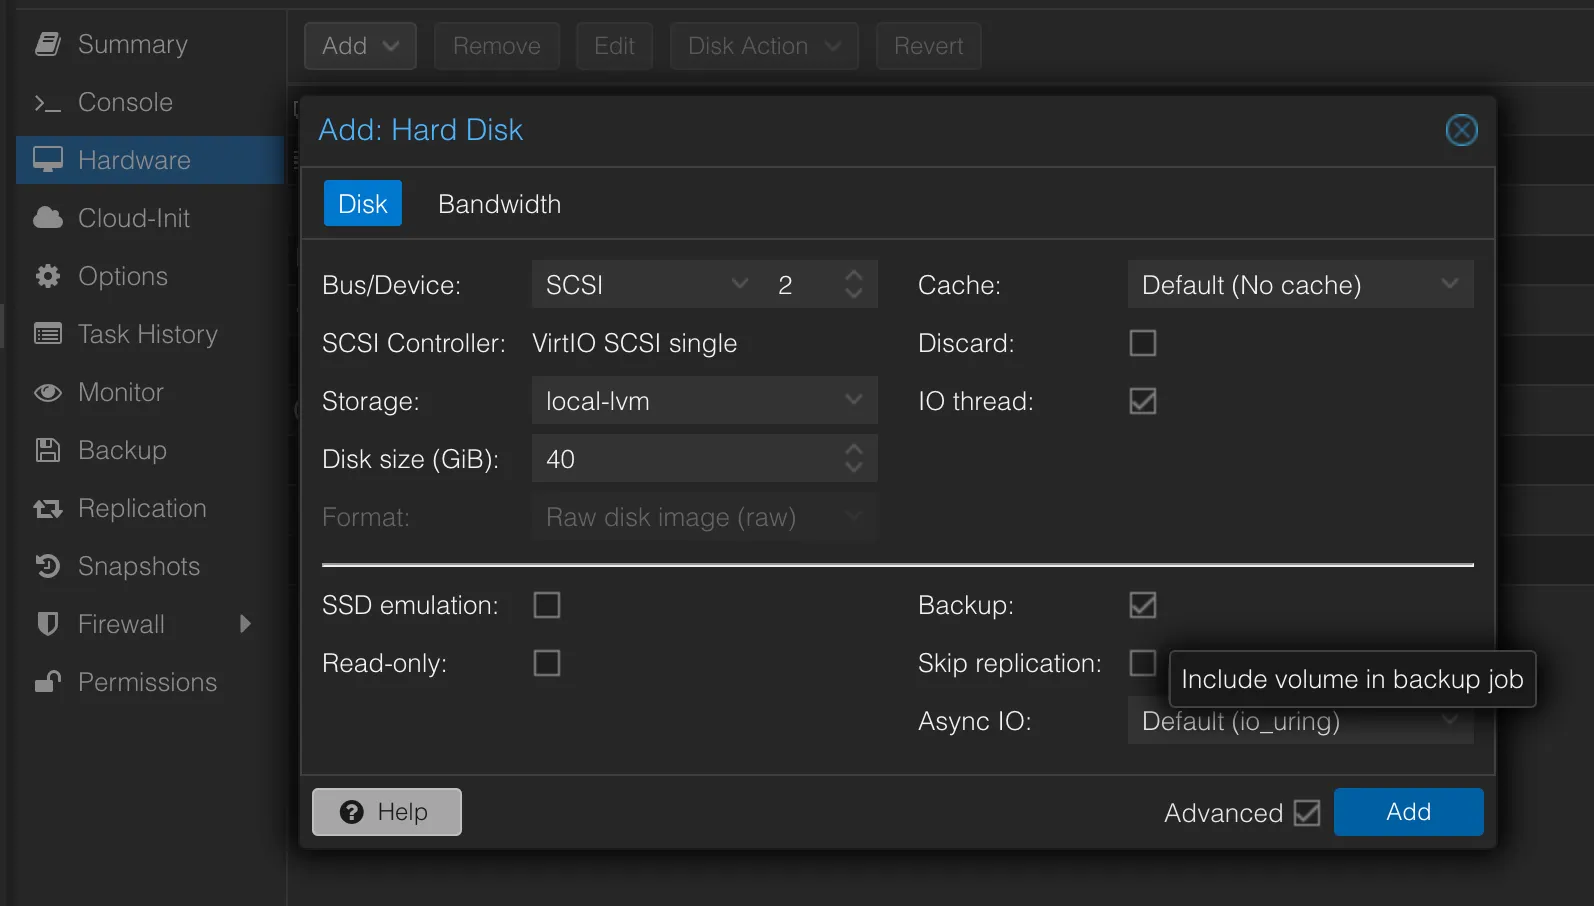
Make sure the Backup option is either checked or not, based on your requirements. In my case, I follow a pattern where:
- if the disk will be storing configuration data or data that is used by services that do not have backup capabilities, I do enable Backups for the specific volume
- if the services storing data to the disk have the ability to backup their data built-in, I prefer going that way as it is generally more reliable and less error-prone and therefore disabling the Backups option in Proxmox
If everything goes right, you should see your disk added to the VM in the Summary section.
Configure storage
Next we’ll need to create the mount point, partition the drive and create the mount configuration.
Create the mount point (here I always tend to choose /data for consistency, unless the service using it does not allow this configuration). This can be done by running
smuraru@citadel:~$ sudo mkdir /dataFind the disk either by the uuid or by it’s size (in VMs with just a few disks of different sizes it’s easier to find it by size, yet one there are at least 2 disks with the same size that becomes difficult)
smuraru@citadel:~$ sudo fdisk -lDisk /dev/sdb: 40 GiB ...Then format to ext4 by running the following command
sudo mkfs.ext4 /dev/sd{YOUR_DISK}And finally, mount it by adding the following line in /etc/fstab
/dev/sd{YOUR_DISK} /data auto nosuid,nodev,nofail,x-gvfs-show 0 0and running sudo mount -a.
And …that’s it
You should have your disk mounted and ready to be used at /data
smuraru@citadel:~$ df -ah /dataFilesystem Size Used Avail Use% Mounted on/dev/sdb 40G 24K 38G 1% /data